Mini TAZ6 Clone
Building a Lulzbot TAZ6 Clone
I’m currently on 3D printer #3. The last one I documented here was #2: my Sintron Delta - a commercial kit which ended up needing a lot of improvements to get it working, hence its presence on these pages. Unfortunately, much as I loved the aesthetics of the Delta format, I was never able to get the frame alignment right so I was unable to print larger pieces consistently or reliably. For my 3rd printer, I opted for another commercial kit but this time I went back to the cartesian format with an Anet A2. This has had issues of its own but nothing serious and I’ve had to do very little work to keep it running reasonably well up to this point. The worst issue so far has been a blown heated bed MOSFET but that turns out to be a known issue which can be resolved with a cheap relay board (if only I’d known before the magic smoke came out!). But while there’s much to like about this printer, it doesn’t tick the ‘portability’ box and I’d really like the electronics to be completely enclosed.
I had a number of options for a printer with the simplicity of a certesian system which is portable and has enclosed electronics but, after much research and reflection, I’ve settled on the Lulzbot TAZ6. Lulzbot actually make two printers: the TAZ and the Mini. Unfortunately, I find myself in the same situation as Goldilocks: the TAZ is too big and the Mini is too small so I’m going to have to adapt one of them to make it ‘just right’. Both Lulzbot printers are completely open but, with its aluminium extrusion-based chassis, I think the TAZ is a better candidate for customisation which is why I chose it.
This will be the first time I’ve built a new printer while the one its replacing is still operational so there are fewer time pressures or production limitations which will make a pleasant change. There are a few machined parts which may prove a little more problematic (oh for a working CNC router!) but I’m sure I’ll manage to produce them, even if I have to re-make them later when I’ve built my new CNC router.
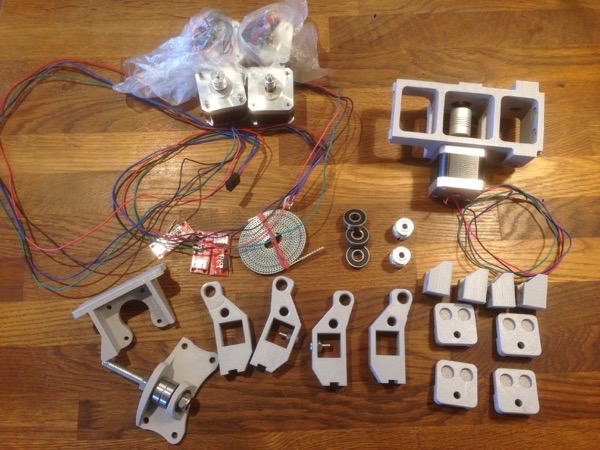
As you can see from the above photo, the Y-axis parts and the lower-right Z-axis bracket are already done and I have motors, pulleys, belts, etc. from my earlier printers so the bulk of this build should come together quite quickly once the printing’s complete and I’ve ordered the chassis extrusions.
Watch this space …
Posted on 22 July 2017