Kossel Mini
Say Hello to Mr. Kossel
This is a retrospective post covering the past couple of months from choosing my new 3D printer to assembly and initial improvements.
From my experiences with the old Prusa, I had a few key criteria:
- Ready-To-Build - When I built the Prusa, I got the parts from a variety of sources because there was no other option. This was a time-consuming and error-prone process, especially as I wasn’t familiar with the printer design and assembly. As the Prusa stopped working again and I want to get a replacement up and running, a ready-built printer or a kit seems the easiest way to proceed.
- Affordable - There’s always a budget with any project. As with most of my projects, the up-front budget for this is quite low but I am able to fund improvements over time. Thankfully, there’s a plethora of cheap options around these days.
- Portable - One of the biggest annoyances with the Prusa was the inconvenience of actually moving it anywhere. Some of my improvements over the years made that less painful but it was never easy and was prone to upsetting the delicate physical state of the machine so it stayed in the garage which didn’t exactly help with its condition or with my motivation to use it. The new printer needs to be completely self-contained and robust enough to handle being moved around.
- Aesthetically Pleasing - it might seem a bit silly but I’m planning on keeping this in the house so it’s got to be as unobtrusive as possible and look at home on my desk in the conservatory to keep mrs. M. on-side.
From these criteria, I narrowed it down to either a Makerbot clone or a Delta. In the end, I chose a Kossel Mini kit on eBay from a company called Sintron. The print volume is a bit more suited to the kind of things I print, the price was lower, the footprint is smaller and, on a subjective level, I think they look more elegant. Marks against it were primarily that I’m not familiar with the Delta configuration which is supposed to be more complicated to set up but they’ve been around a while so I figured I wouldn’t be completely in the dark.
Assembly and Configuration
Shipping was quick as it came from a UK warehouse. Here’s what I was confronted with when I opened the box:
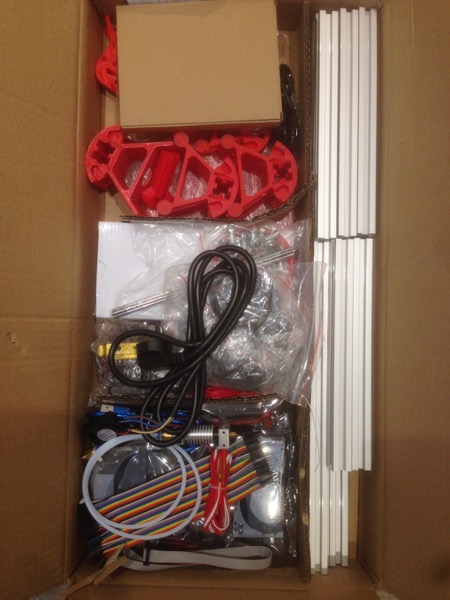
It’s definitely built to a price. The printed parts were OK - certainly better than the Prusa i2 parts I bought all those years ago. The electronics are all generic and just chucked in the box - no cut-to-length leads or anything nice like that. The power lead looked like a dubious Chinese fire hazard so it went straight in the bin. It’s also a good thing I have a big bag of zip ties, spare wire and suchlike.
It took me a couple of evenings to get it assembled and a weekend of reading and fiddling to produce my first successful print. It turns out that Deltas are more complicated to set up but, if you’ve got some experience with 3D printers and know your way around Google, it’s not too onerous.
The instructions provided by Sintron are taken from a different manufacturer with a slightly older design of printer so they’re missing a few things and other sections are either irrelevant or a bit sparse. This was particularly annoying with the effector assembly and wiring, the z-probe and with fitting the heated bed but some research and thinking time resulted in satisfactory solutions.
The one area where I strayed completely from the instructions was in fitting the power supply. There isn’t sufficient space in the base for the supplied PSU and it seems that they expect you to leave it loose outside the printer - at least that’s what I infer from the lack of any mention of it in either the instructions or the actual product photos. Anyway, I had no intention of doing that so I pushed the vertical beams through the bottom corner brackets to raise the base and fitted the PSU to the underside of it using a couple of M3 screws. This does mean I lose about 50mm of print height but there should still be more than enough for my needs.
Finally, the Marlin firmware supplied by Sintron with (supposedly) correct settings was both incompatible with my version of the Arduino IDE and not actually supplied with the correct settings. After much experimentation with different options, I settled on the Repetier suite (more on this later).
Issues
I ran into a number of issues with the printer after initial assembly. Nothing which stopped me using it but they definitely needed resolving before I could move onto printing more interesting things.
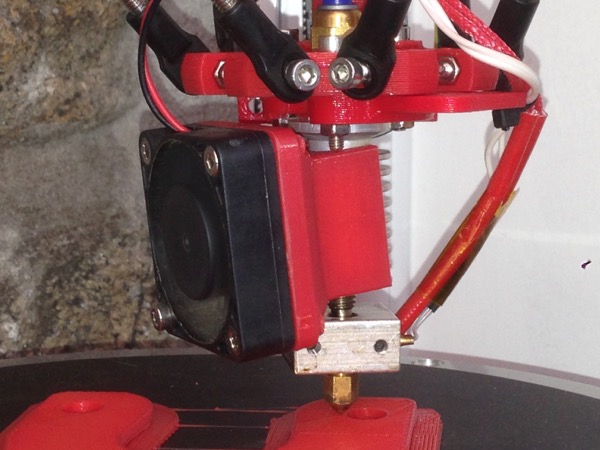
Hot End Cooling
The supplied fan fits on the hot end retainer bracket with a couple of M3 screws. There’s nothing to direct air flow - it just hangs there and politely suggests that the hot end cool down which led to a blockage during testing. So one of my first non-calibration prints was a fan mount designed for the Sintron because (of course) the barrel size is unique and doesn’t fit any of the regular designs out there. It’s still a bit loose on the barrel and the fan is running at full speed so is very noisy, but it’ll do for now.
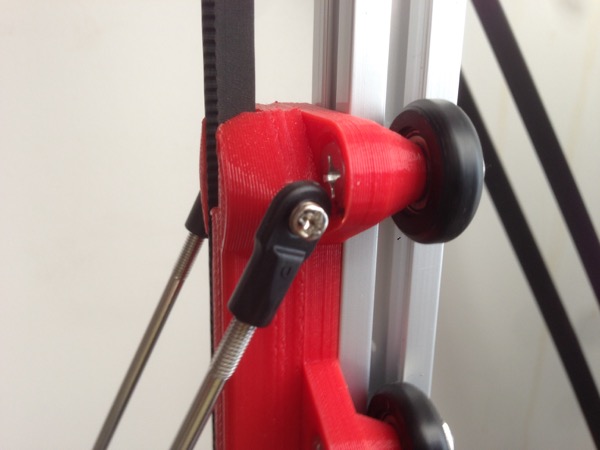
Ball Joints
The ball joints supplied with the printer were too large so they kept making contact with the carriages, with the effector and with each other. Some people have tried to work around this with spacers and different designs of effector; I decided to order some Traxas joints which completely solved the problem.
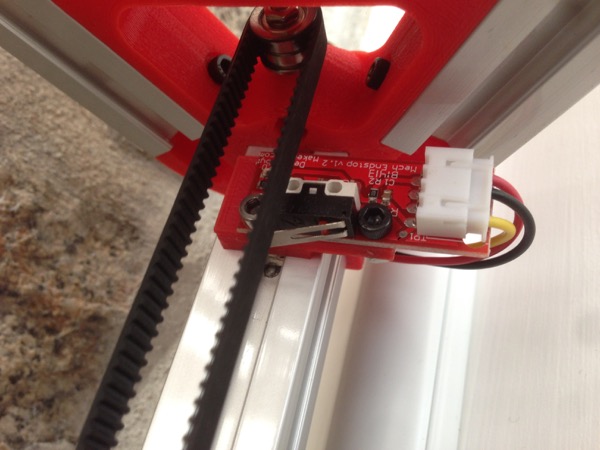
End Stop Mounts
The supplied end stop mounts were just thin slivers of plastic. There were no clear instructions for fitting them and the best I could come up with was prone to moving when knocked so I went hunting. Another Sintron customer had the same concerns and designed some great replacements.
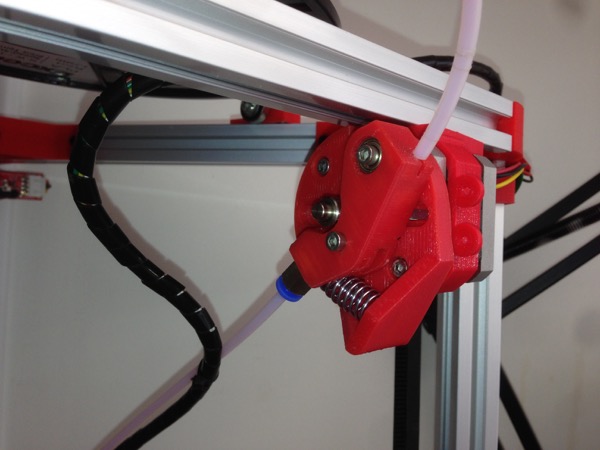
Extruder
The direct drive extruder supplied with the kit was OK but I had problems with it sometimes. The extruder gear had overly-aggressive teeth which, when combined with the high spring tension needed to prevent slippage, caused the filament to weaken and fold up on itself in the gap between the gear wheel and the bowden entry. This was worse on long prints, prints with lots of retractions and on warm days.
I designed a small guide to slot into the space which mostly resolved the issue but there was still a lot of slippage so, after some research, I upgraded to a Mk.8 extruder gear. Due to the change in gear diameter, this necessitated a whole new extruder. After some more research, I settled on the B’Struder which has been working really well. I took the opportunity to move the extruder under the top frame and shortened the bowden tube by about 200mm which helped to reduce stringing too.
Improvements
After fixing the major issues, I set about some initial improvements to make the printer more pleasurable to use.
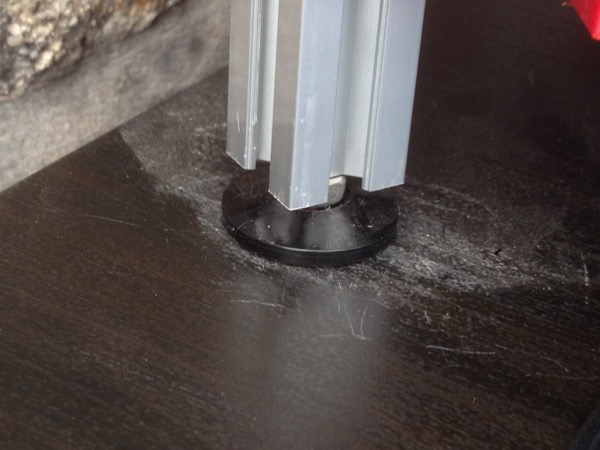
Feet
Rather than having the extrusion ends directly on my desk, I found some M6 screw-in feet on eBay and tapped some threads into the ends of the vertical beams.
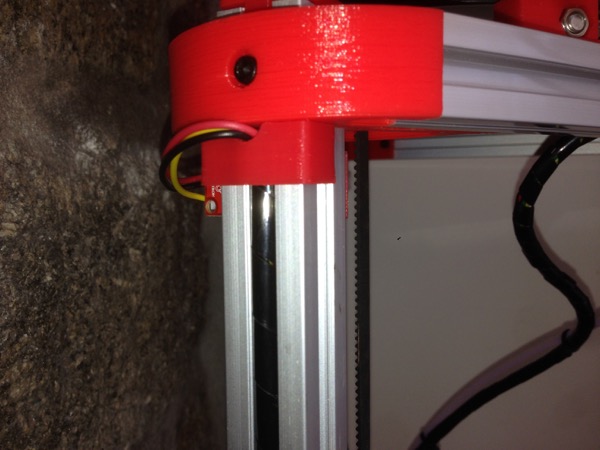
Wiring
I wasn’t happy with the wires which run up the vertical beams just hanging in the breeze so I bought some 8mm spiral wrap. This is just the right size to squeeze into the outer beam channel and makes for much neater wiring. I also designed some clips to make it look a bit nicer.
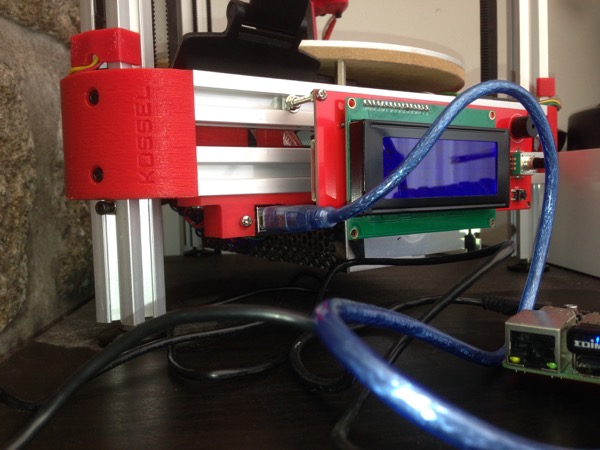
Print Server
I’d been using Octoprint on the Prusa for a while which is much more convenient than tethering my laptop for the duration of the print. It also overcomes some occasional performance issues I’ve seen with the communication between my laptop and printer. As I was using Repetier firmware and host software, I decided to try the Beta version of Repetier server on my Raspberry Pi 2. I also got a new webcam which has better support on Linux.
My biggest annoyance with the old Octoprint setup was the need to log in and properly shutdown the Pi rather than just hitting the power switch like a regular embedded system. To solve that, I installed Raspbian on a read-only partition and created a small ext3 partition for the Repetier data with settings to make it as resilient to hard shutdowns as possible.
So far, it all seems to be working as intended and the Repetier server software works very well. I still need to finish re-arranging the electronics in the base to fit it all in.
Buildtak
Never tried it before so thought I’d give it a go as I was having some first-layer adhesion issues. Amazing stuff!
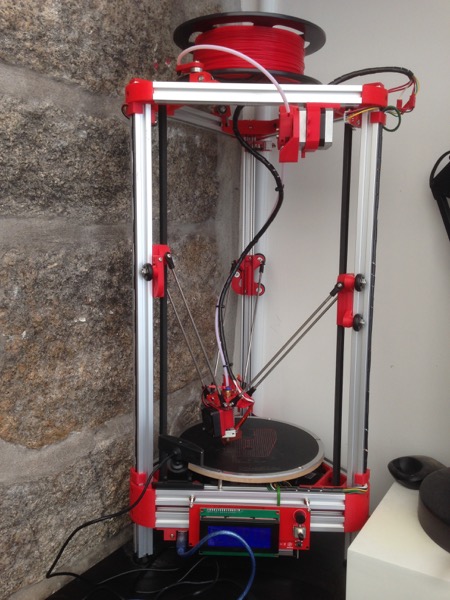
Here’s a photo of the new printer at the time of writing:
Future Improvements
It’s working pretty well now but there are some more things I want to improve:
- Vertical Carriages - The bearings supplied in the kit are very sloppy which results in wobbly vertical carriages. I think this is causing minor layer alignment issues and is possibly the cause of some hot end crashes so I’ll be replacing the carriages with something more solid soon.
- Hot End - The supplied one doesn’t perform very well at speed and it’s a non-standard size which makes finding accessories to fit difficult. I’ll get something a little more standard.
- Print Bed - The aluminium heated bed is quite badly warped and Repetier’s distortion correction routines don’t seem able to completely resolve it so I’ll try fitting a glass bed soon.
- Noise - It’s very noisy while printing. The motor in the new extruder (salvaged from my Prusa) seems to be quiter than the supplied one so I plan to swap the others. I’ll probably fit some stepper vibration dampers and some rubber pads on the bottoms of the feet too.
- Print Cooling - The hot end has a cooling fan but there’s nothing cooling the print which will definitely improve print quality. I’ll be printing a new effector with integrated fans to solve this.
- Power Lead - I’m still using a lead which connects directly to the PSU’s screw terminals. I plan on fitting an IEC kettle socket to make the lead removable.
- Z-Probe - It currently uses the manual one supplied with the kit which is annoying and a bit flimsy. I’ll probably change to something integrated in the new effector or on the print bed itself.
- Filament Mount - The one supplied is a little tight so creates unnecessary resistance, especially at the end of a reel. The reel also only rests on the bearings so isn’t very secure when being moved. I’ll print something which runs on a central bearing and actually retains the filament reel.
- Bowden Tube - It’s better than it was after being shortened but there are still problems printing at speed. The common solution to this on deltas is to fit a flying extruder. I may also consider a Flex3Drive.
Was It Worth It?
At the time it was the cheapest kit around and, on the basis that you get what you pay for, I suspected I’d run into problems. Overall, I’d say the kit was OK but I have had to do quite a bit of work to get it running reliably. Since buying mine, I’ve discovered a few other kits which are reported to be better so, given my experiences with the Sintron so far, I’d probably give one of those a go if I was to buy another kit. Saying that, I don’t actually regret my choice as it’s been an interesting and fun learning experience and I’ve had the time to spend on it.
If you want a good out-of-the-box experience, I’d suggest looking elsewhere. If you’re happy to tinker and you have a very limited budget, the Sintron is probably worth considering but go in with your eyes open and expect to either live with the shortcomings or to spend some time and money fixing them.
Posted on 22 May 2016