Reprap Prusa i2
P..p..p..print up a penguin!
After my hot-end mishap last November (I can’t believe it’s been that long!), other priorities and some employment changes left the Reprap gathering dust in a corner until my mate, Dave, asked me to print him some parts for his quadcopter. Time to get back in the workshop!
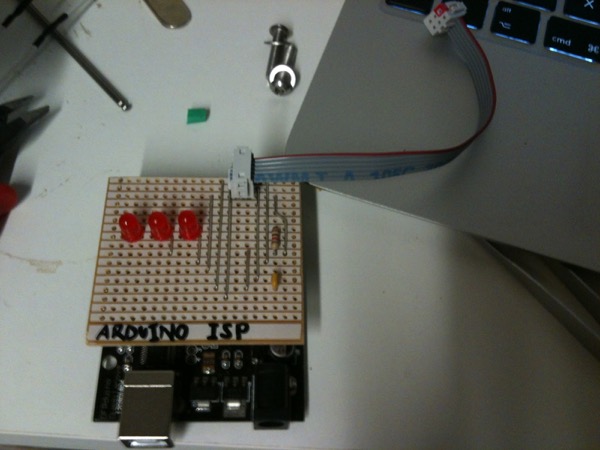
Last time I had it running, I was using Ubuntu and I was able to communicate between my laptop and the Reprap without issue. Early signs this time (using Mac OSX) weren’t so good. My first suspicion was the Mac version of Pronterface but failure to connect to the Sanguinololu over USB led me to suspect the board software. I eventually managed to upload the Sprinter firmware directly over ICSP and, after resetting the Atmel’s fuses, it worked again. I spent a little more time looking into software options and decided to give Repetier host a go as it has better object layout options. I still don’t know why the USB wasn’t working but I’ll have to come back to it later, when I’m happy with the state of printing.
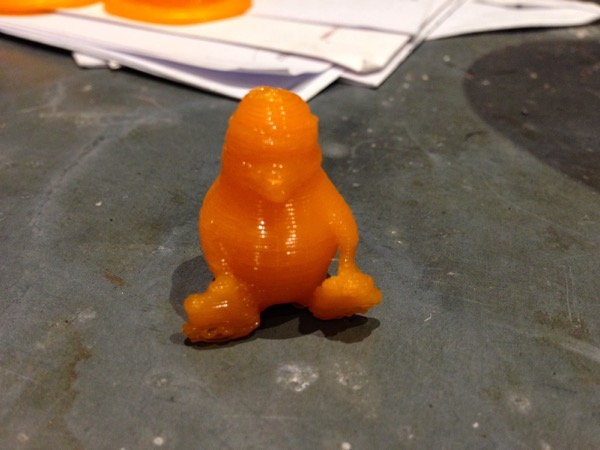
So, I’m back where I was a year ago: a fully-working printer ready to try printing something! After some tweaking, a test cube magically appeared on my print platform and it didn’t look too bad. My first completely successful print and a small celebration :) Next up was a small ring promised to Fran which seemed to go well too. Boosted by this success, I decided to try printing a scaled version of Tux, the Linux penguin (photo above). It’s not perfect but it printed and was a good end to a day of tinkering.
The next day didn’t go so well. I tried a larger object and started seeing problems - inconsistent filament width and then plastic oozing out of the hot-end. Remembering last November’s experience, I got a sinking feeling in my stomach. Nothing for it but to strip the hot-end down and try to clean it up. This took the rest of the day but I ended up with a cleaned and rebuilt hot-end, reassembled with extra PTFE tape to try and avoid future leakage.
Forward a few days and I was back in the workshop fiddling with settings and getting mixed results but nothing usable. I eventually traced it down to the filament not feeding cleanly. I’m not sure what’s causing it but I’ve found I can work around it by clamping the extruder feed components really tight. Not an ideal solution but it’ll do for now, until I’ve got things working well enough to justify stripping it all down again.
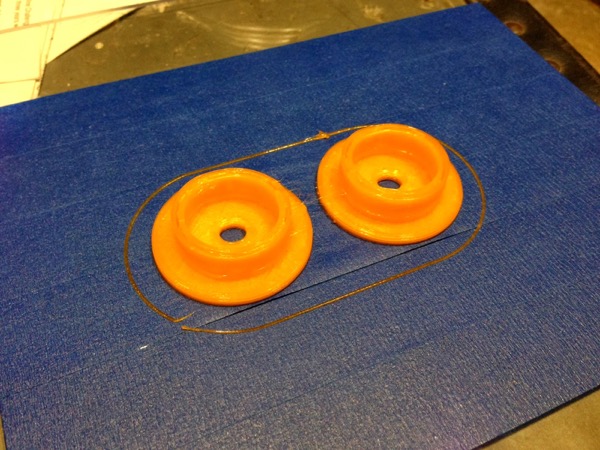
This evening, I decided to finish the initial tuning and go for a real-world print. I’m planning on building a filament reel holder to mount on top of the printer and I need a couple of bushes to hold it on the spindle so I quickly threw something together in Autodesk’s Inventor Fusion and set it off. After a few aborted attempts, I finally had something which was looking promising - holding my breath all the way! You can see the end result in the photos at the end of the page.
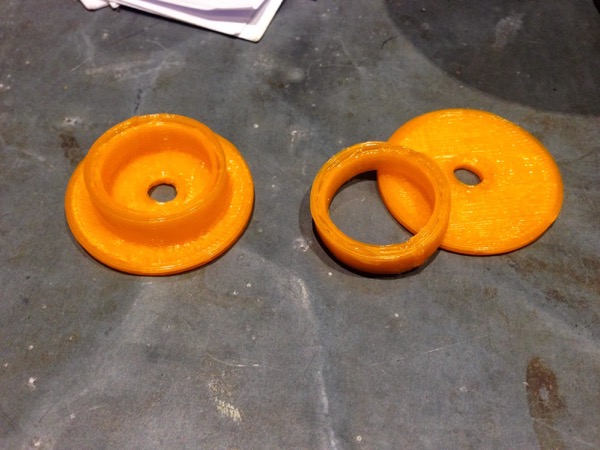
The printed parts don’t look too bad considering their intended use. The surfaces are fairly smooth but there are some issues with layer alignment (wobbly x-axis suspected), some of the layers haven’t bonded (layer height and/or temperature adjustments?) and the fill on the taller section hasn’t worked (reduce infill speed or possibly a Slic3r setting somewhere?). So, more tweaking to do but these should enable me to build the reel holder.
The next step is to try and resolve these remaining issues. Then I’ll make a start on a second printer! Well, I figure I could do with a fallback and something to experiment on without being printer-less. And I’ve got most of the parts, so why not? A Prusa i3 this time, I think :D
Posted on 22 October 2013