Reprap Prusa i2
Farewell hot end, we hardly knew ye
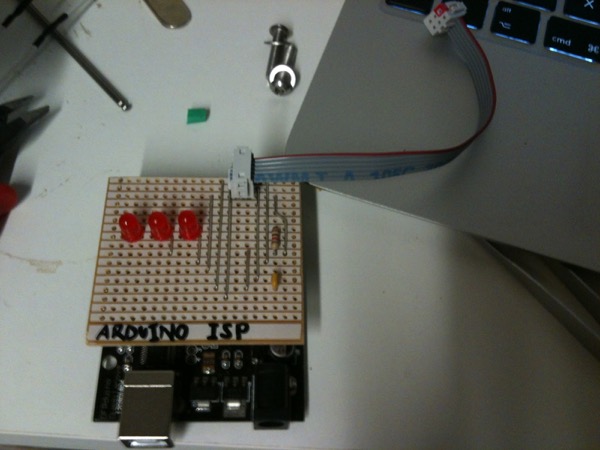
Following the problems with my first print, I spent Thursday and Friday evenings sorting out the programming situation. I now have an Arduino ISP (in-system programmer) backpack made up with stripboard which is a more permanent solution for bootloader programming than having to make it up on a breadboard each time I need one.
Next, I sorted out the fuses to disable JTAG and still be able to upload new firmware via the FTDI connection. The commands, for personal reference and in case anyone else finds them useful, are:
avrdude -c stk500v1 -p m644p -U hfuse:r:./hfuse.txt:h -P /dev/ttyUSB1 -b19200 && cat hfuse.txt
This reads the high fuse out to hfuse.txt and then displays the contents of that file in the terminal. You can do the same for lfuse (low) and efuse (extended) if you need them (avrdude supports multiple -U entries). It assumes an arduino-ISP on USB1 and an Amtega644P - change these to suit your requirements. And:
avrdude -c stk500v1 -p m644p -U hfuse:w:0xDA:m -P /dev/ttyUSB1 -b19200
This writes the new fuse value (0xDA - Sanguino defaults but with JTAG disabled) to the high fuse.
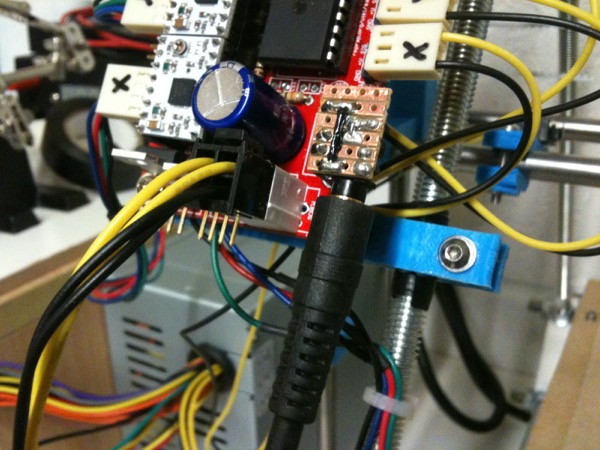
Then I found an old FTDI cable terminated in a 3.5mm plug which I forgot I had. Using this would not only free-up the FTDI breakout board but, because this cable doesn’t supply power (only data), it would also avoid the annoyance of having to unplug USB every time I need to completely turn the board off. I made up a small adaptor which is now more convenient and easier to fix on the board - hooray for stripboard!
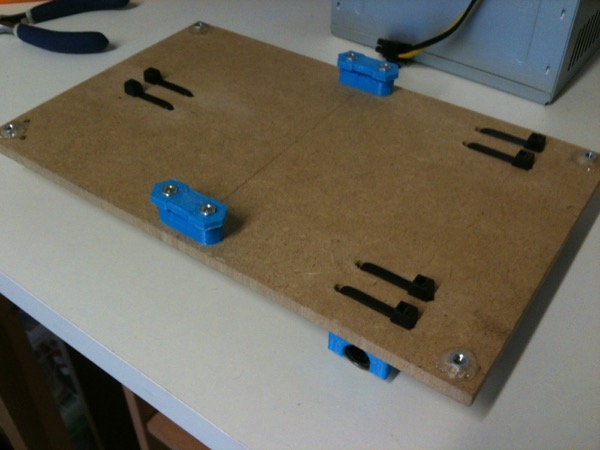
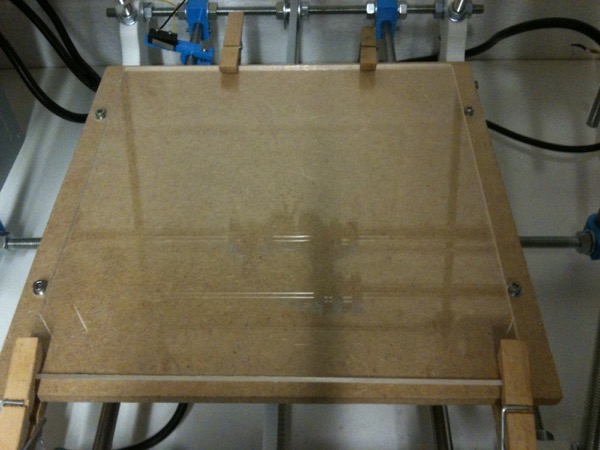
With the programming issues resolved, I started today with the intention of sorting out the various Z-axis problems. I started by removing the Y-carriage to improve the print bed adjustments and clamp the bearings which were a bit loose. As you can see from the photos, below, I’ve used zip ties on the bearings and I’ve glued the M3 nuts to the bottom print plate so I don’t have to get hold of them with pliers every time I want to adjust them. Re-assembling the springs was a little more awkward but adjustment is much easier.
I also cut a piece of perspex to use as a flatter print surface. I’m using clothes pegs to hold it in place for now as I don’t have anything else suitable. The standard approach is to use bulldog clips so I’ll probably pick some of those up if the perspex works.
Then I messed about with the Z-axis smooth rods to try and get them running better. I think they’re now as good as they’re going to get and don’t seem to snag in use.
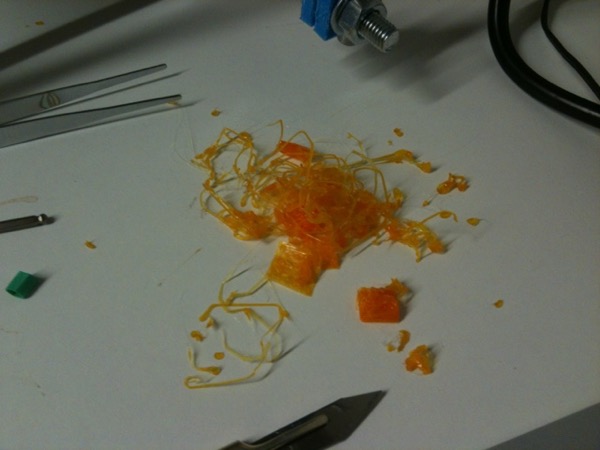
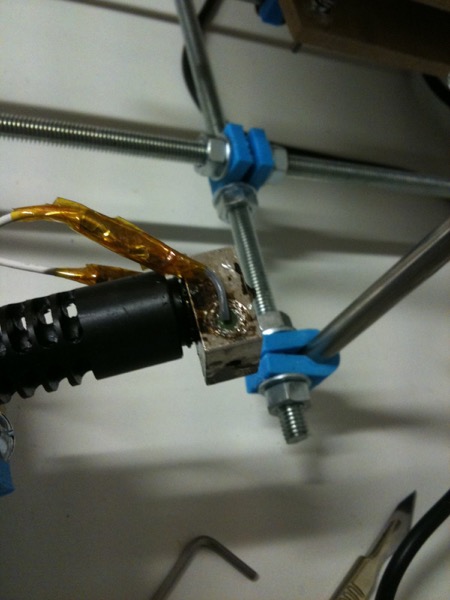
With everything re-assembled, I powered up the board and waited for the hot end to get up to temperature. After a couple of minutes, steam started billowing off of the aluminium nozzle block and PLA was oozing out from the Kapton tape wrapping. I turned the heat off immediately and reversed the filament then waited for the hot end to cool down. After a complete strip-down, I found the nozzle was completely blocked by burned PLA so the temperature had obviously gone too high. It took a while but I eventually got everything cleaned up and reassembled. Unfortunately, I didn’t secure the thermistor sufficiently during testing; it popped out, the hot end overheated and the plastic threads melted, effectively destroying the hot end. So, my workshop now stinks on molten plastic and I have to wait for pay day before I can order a new one :( I think we’ll chalk this one up to experience.
Posted on 11 November 2012