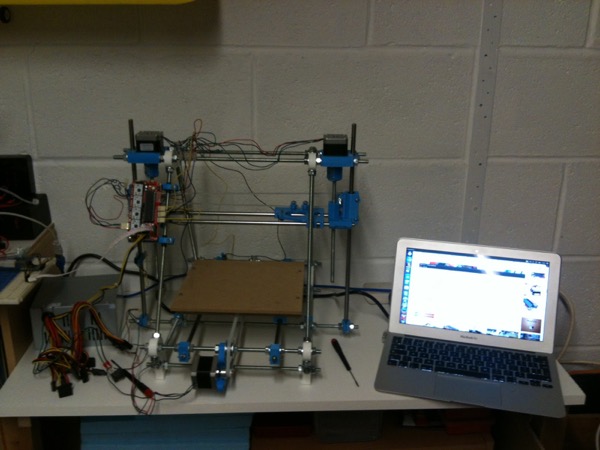
Reprap Prusa i2
Electronics working!
It’s been a frustrating, but ultimately successful day wrestling with the electronics today. I started by moving the circuit board on to the front-left bar as I was concerned the holder was going to obstruct free movement of the plastic filament through the top frame during printing. By moving it to the side, the board is more directly in line with the X-stop and X-motor which should also help to avoid tangles and it’s physically closer to the Z-stop and Y-motor, making the wire routing easier. I moved the Y-stop to the left rail too, bringing that closer to the new board location.
Once everything was wired up, it was finally time to tackle the electronics. I started with the ATX power supply by adding a rocker switch between the ‘on’ wire and a ground wire to act as a master power switch. After confirming it’s supplying 12 volts and that the polarities match those on the board’s power connector, I removed the Pololu boards, plugged it in and turned it on. The LED lit up - we’re looking good so far! Next up was to burn the bootloader; this is where the problems began.
I have an old USBtinyISP but I haven’t used it for some time. I plugged it into my laptop and it lit up and was recognised, which was a good start. I installed the Arduino IDE and, after a while, discovered where to install the Sanguino libraries. For future reference, and for anyone else who’s playing along, you extract the whole ‘sanguino’ directory to /usr/share/arduino/hardware. I selected the relevant board and programmer options, clicked “burn bootloader” and promptly got an error. I wasn’t sure if the problem was with the programmer, the RepRap board or the Atmel processor so, after a few more unsuccessful attempts, I decided to try burning a new bootloader to my Arduino Duemilanove which I know works. This produced the same error so I figured there was either a problem with the programmer or with the software.
So, option 2: Burn the bootloader with an Arduino as an ISP. I removed the Atmel from the board, wired up the connections on a breadboard and tried again. More errors! After re-checking the connections, it turned out I’d miscounted the pins on the right side of the Atmel. D’oh! I corrected that but then my laptop couldn’t see the Arduino’s serial port any more. Disconnect and reconnect a few times: nothing. It still powers up fine over USB so I tried plugging it in to the other USB port. That worked and the bootloader was finally burned! Yay! On to the firmware …
I have a couple of old FTDI breakout boards which I’d planned to use in place of the on-board USB. Annoyingly, the connections on the board’s 6 pin USB2TTL connector don’t match the connections on the breakout board. I patched them on a breadboard to get it working but I’ll have to make a permanent adaptor at some point. To make sure things were working before I attempted to upload a full firmware, I decided to upload the example “BareMinimum” sketch. That worked first time. I then downloaded the latest Sprinter firmware and configured the settings before attempting to upload it. This resulted in “avrdude: stk500_recv(): programmer is not responding”. After a few more unsuccessful attempts, I hit Google and discovered a possible workaround by holding down the reset button until the sketch finishes compiling. That worked so, after several hours, I now had a fully programmed board.
After a quick reference voltage check and minor adjustment of the Pololus, I hooked everything back up, closed my eyes, crossed all my fingers and hit the power switch. Quietly humming power supply; glowing LED on the board; quiet noise from the motors. I wasn’t sure what to expect but there was no smoke or motors going crazy which I assumed was a good thing.
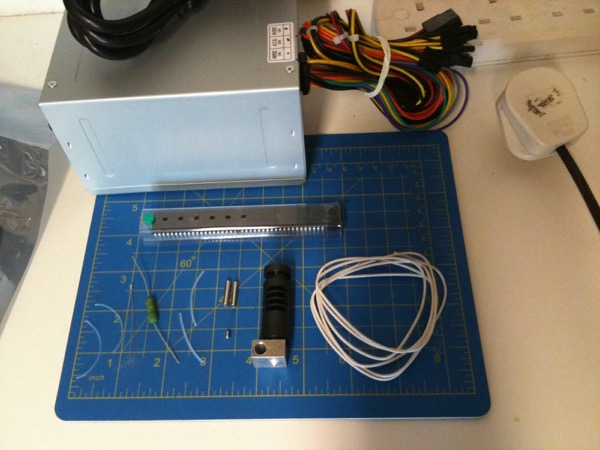
The final stage, today, was to set up the host software on the laptop which would enable me to control the motors. I installed Printrun which seems to have a nice GUI as well as a command line interface. Once I’d plugged in the USB cable and clicked “connect”, I was able to move the motors, albeit in only one direction. It seems that I haven’t configured the firmware end stop settings properly so, following advice on the RepRap wiki, I tested each motor individually with the extruder driver controller (which doesn’t have a stop). Bingo! All three axes move in both directions. A good end to a frustrating day. Here’s a photo of my electronics bench just before I wrapped up for the evening:
Tomorrow, I’ll be sorting out the end stop issue, fitting the extruder/hot end, tidying up the wiring and doing final alignments. If I have time, I might also make that permanent FTDI adaptor and it’s possible that I’ll do a dry-run print of a real model. If all goes well, expect video :)
Posted on 03 November 2012